")
I have been using Canva daily for my website, marketing, print, and social media projects and it has made my life so much easier. I am now managing multiple projects and teams in Canva and I wanted to share some of the tips I have learned in recent weeks.
I have been an Adobe user for years but I have never been a pro user. It just seems too complicated for my own personal uses which is mostly graphics for websites and social media for other agencies and businesses. Canva teams allows me to collaborate with my clients in ways that Google Drive or Dropbox simply cannot. So, let’s get started and explore how to create and manage teams and projects in Canva!
The Comprehensive Guide to Managing Projects and Teams in Canva
In this step-by-step guide, we will walk you through the process of creating and managing teams in Canva, a game-changing feature that allows you to collaborate efficiently on design projects.
Unlock Your Team’s Full Potential Using Canva Teams & Projects
Using Canva teams offers numerous benefits for individuals and organizations looking to enhance their design workflows and collaboration. Here are some of the key advantages:
Centralized Collaboration
Canva teams allow multiple users to work together on a single design, making it easier to share ideas, provide feedback, and iterate on concepts in real-time. The shared space allows invited team members access to templates, logos, fonts, and other brand assets, ensuring consistency across projects and streamlining the design process.
Better Project Management
It also allows you to assign different roles and permissions to team members, giving you control over who can edit, view, and share designs within the team. Canva teams enable users to create folders for different projects, making it easier to manage and track progress on multiple designs simultaneously. For example,
I work with a large corporation that handles marketing for a number of different departments and so I can dip into social media assets and others can dip into the website assets I am working on.
Efficient Communication = Time & Cost Savings
It can facilitate in-platform communication, allowing team members to leave comments, suggestions, or feedback directly on a design, eliminating the need for lengthy email threads or external messaging apps. I also like how Canva teams can be integrated with various project management, cloud storage, and social media platforms, which I hope to explore further in the near future.
Step-by-Step Guide to Managing Projects and Teams in Canva
Adding A New Team on Canva
Next, let’s explore the process of adding a new team.
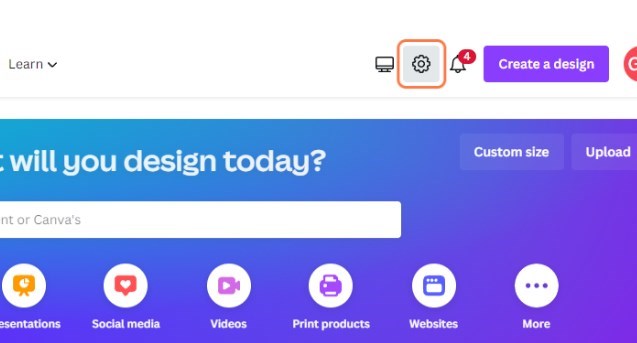
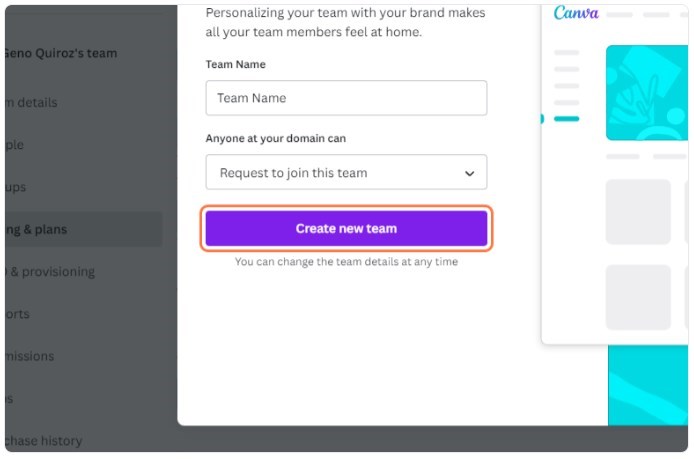
1. Go to Canva and login
2. Click on the account settings (Gear Icon)
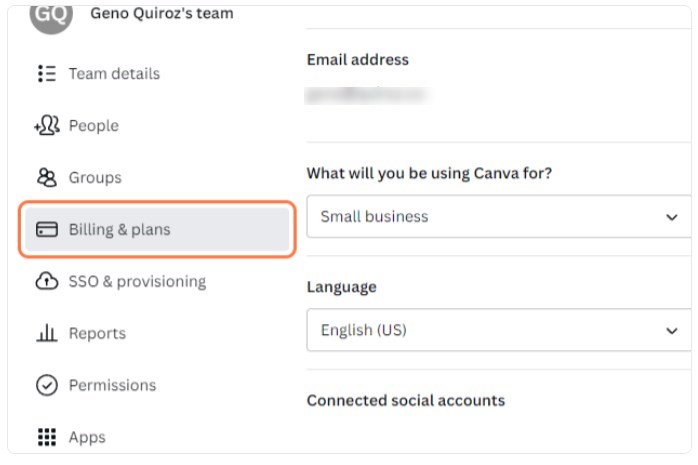
3. Click on Billing & plans
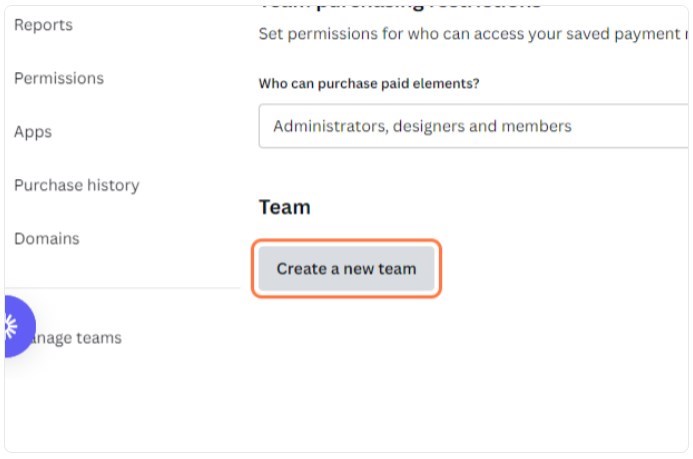
4. Click on Create a new team
5. Type in the name of your team (eg: name of your company or your client)
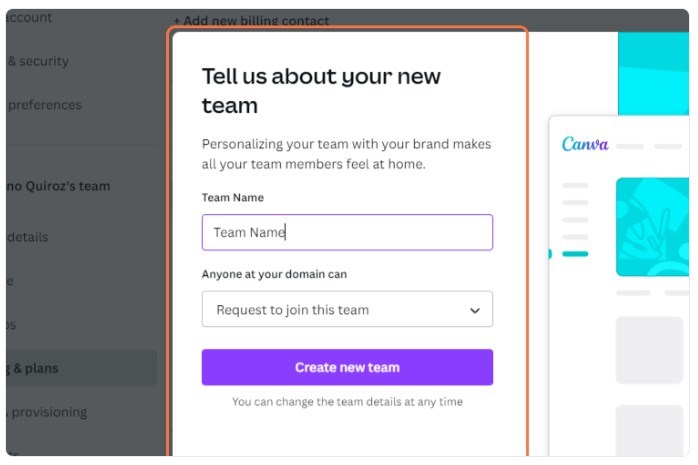
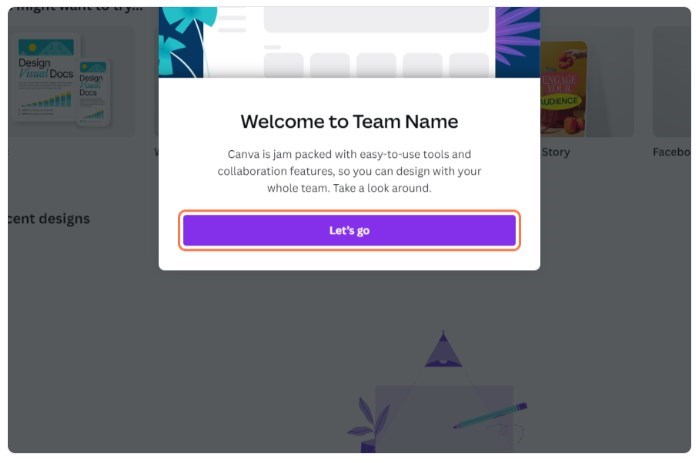
6. Click on “Create new team”
7. Click on “Let’s go”
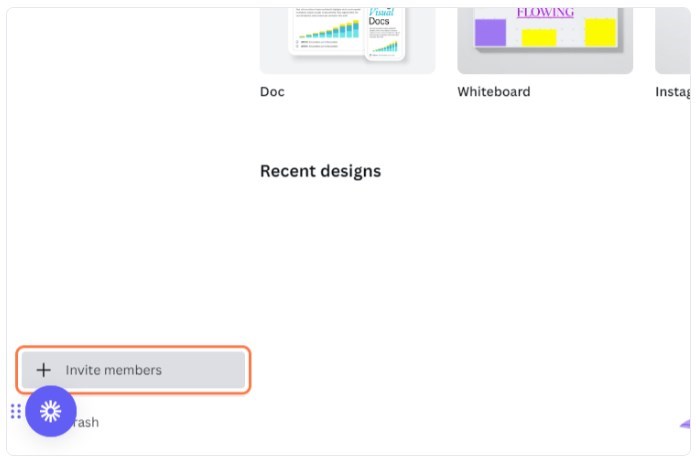
Inviting Members to Your Team on Canva
Next, let’s explore the process of inviting others to your team.
1. Click on “Invite members”
2. You have the option to enter email addresses of the individuals you want to invite or to grab a link to send to others.
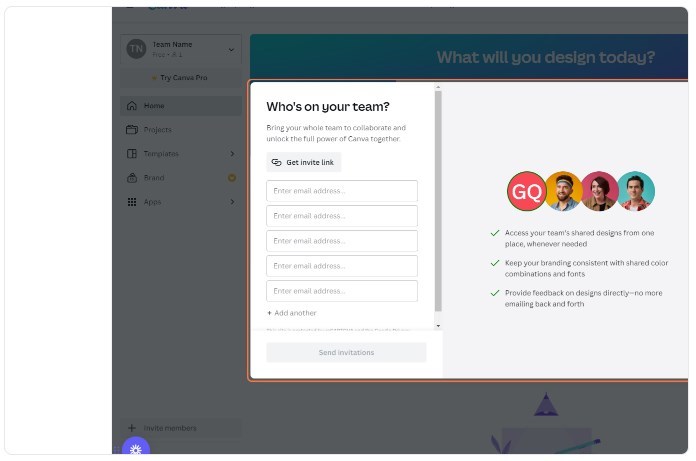
3. If you opted to enter the email address, click on “Send invitations”.
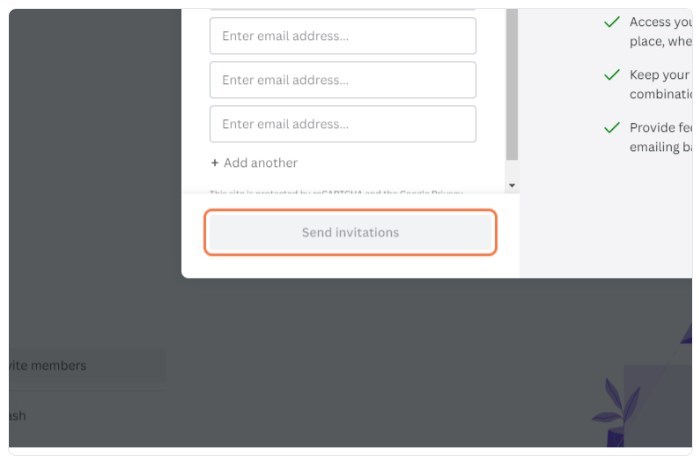
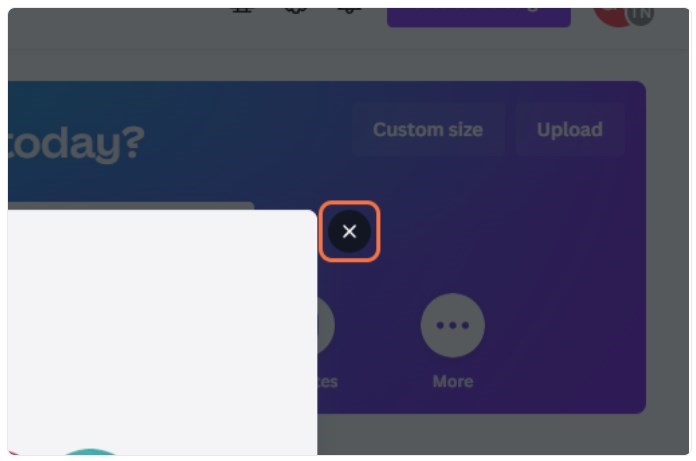
4. Click on close and begin working 🙂
Adding Project Folders for Your Team on Canva
Next, let’s explore the process of adding project folders for your team on Canva.
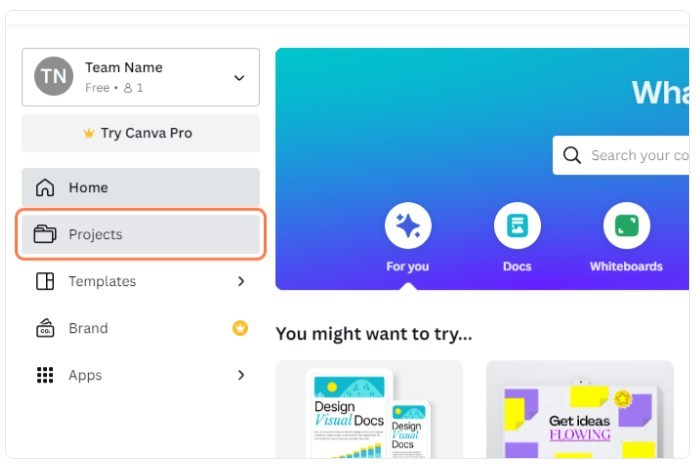
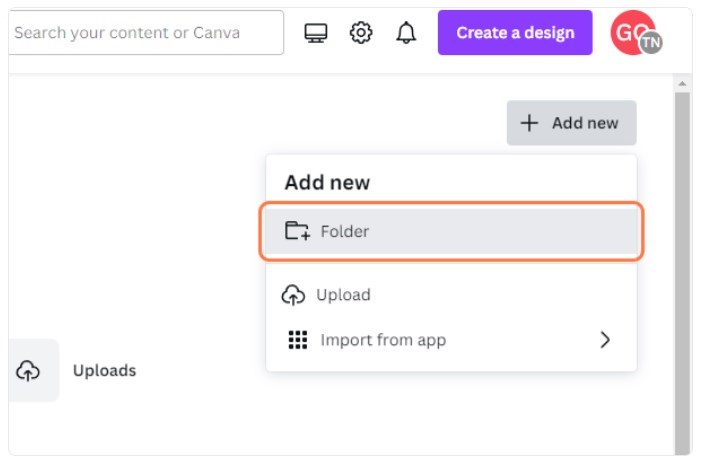
1. Click on “Projects”.
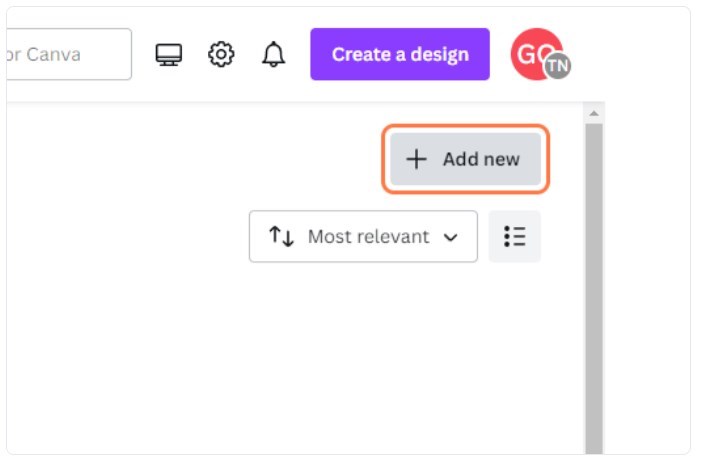
2. Click on “Add new”
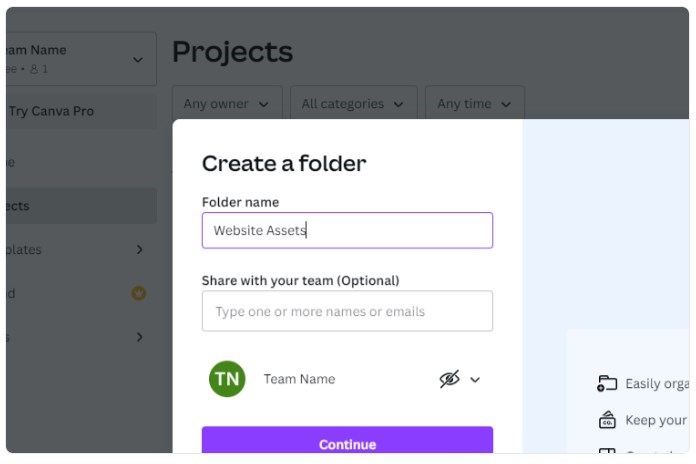
3. Click on “Folder”
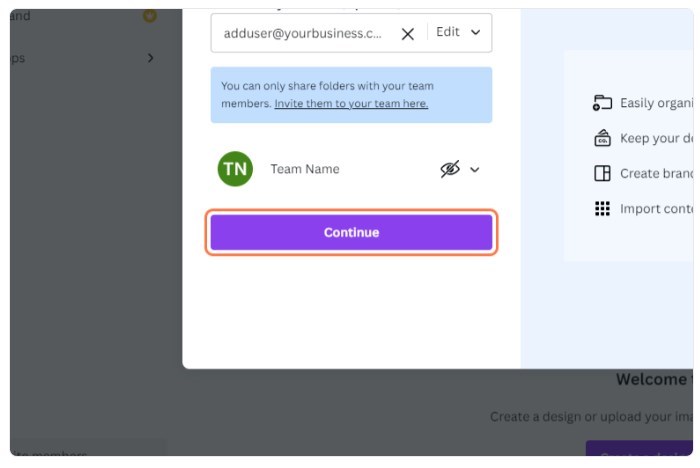
4. Give your Project folder a name and invite the members of your team that will have access to this folder.
The great thing about this feature is you can limit who has access to various project folders just like Google Drive. (note: If your invitees have not accepted the invitation yet, they wont be available as a team member until they do.)
5. Click on “Continue”
Switching Between Multiple Teams on Canva
If you are on multiple teams, it is easy to toggle between all of them.
1. Click on your team name on the upper left hand corner of the dashboard.
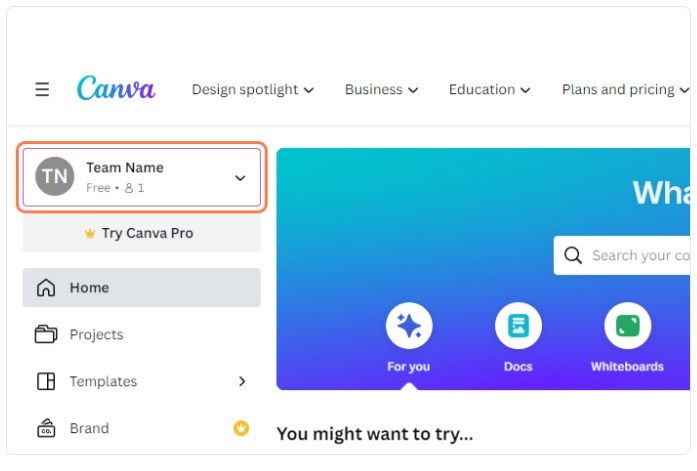
2. There you can choose which team you would like to switch to

Quick Tips For Canva Pro Users
Here are a few tools I use all the time along with some tips on how I am using Canva Pro. This part is far from exhaustive but I plan on adding to this section over time and as I get more experience working with teams.
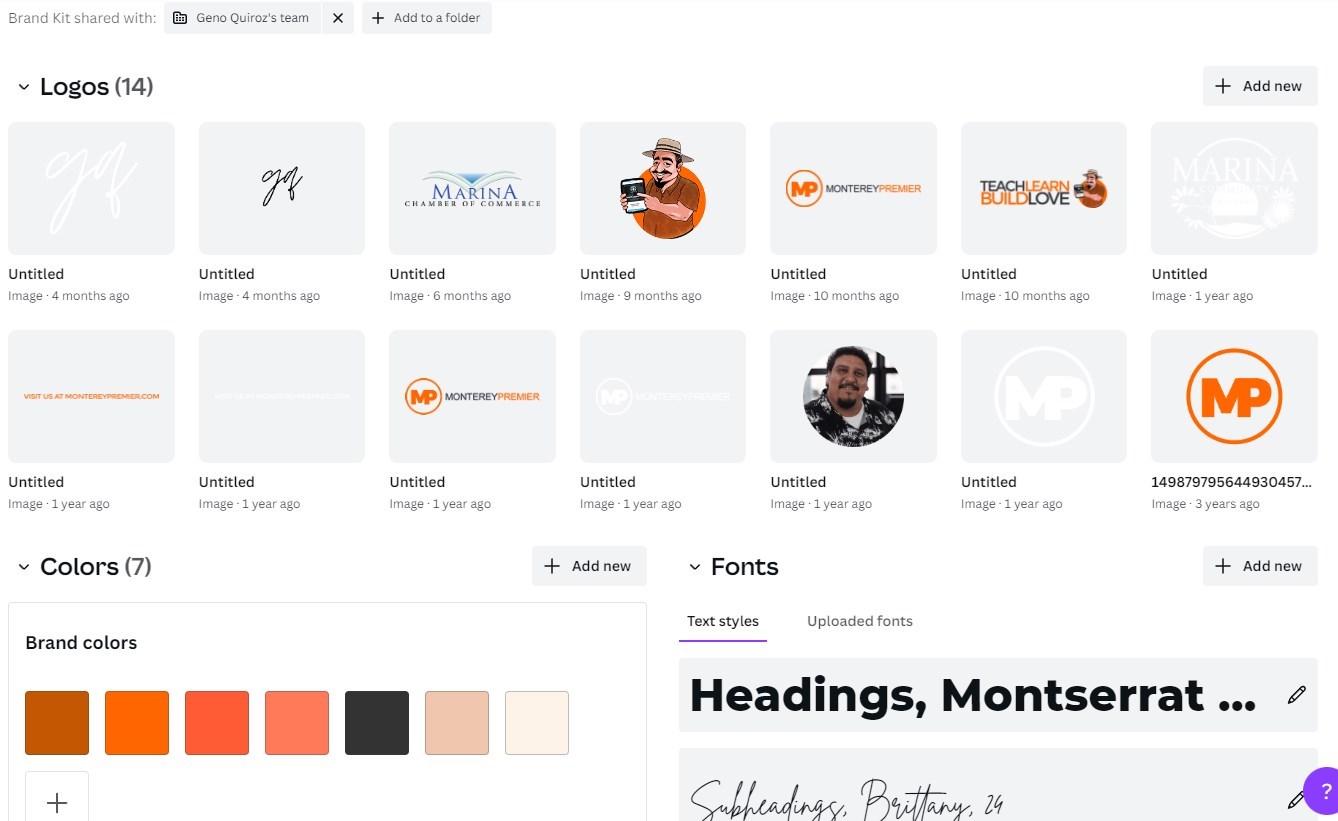
Brand Kit
I love this feature. Brand Kit consolidates your entire brand identity into a single, easy-to-access location, whether you’re building your brand from the ground up or incorporating existing assets. Once configured, you can effortlessly access your brand fonts, logos, colors, icons, images, graphics, and pre-designed Brand Templates directly within the Canva editor, enabling you to apply your brand elements consistently as you create designs.
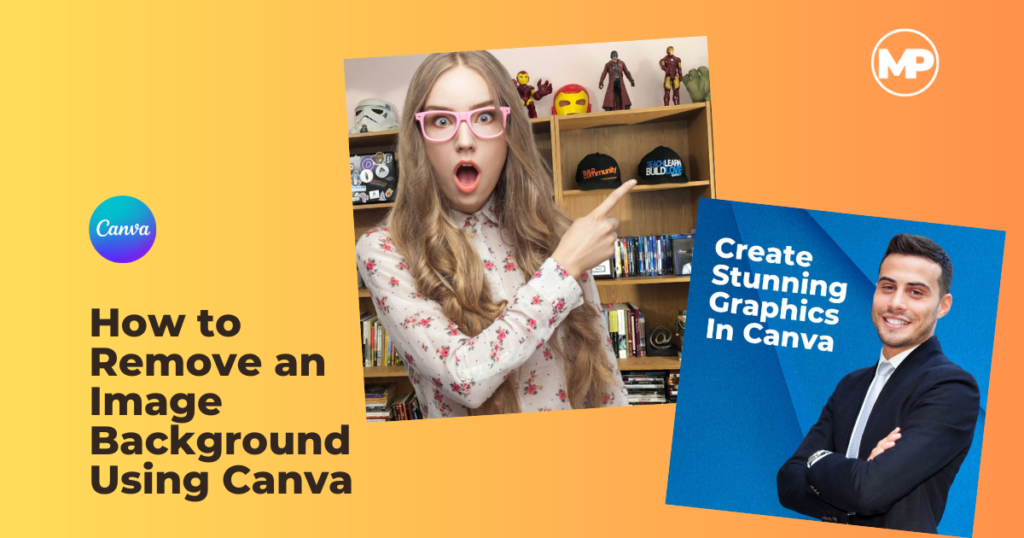
One-click Background Remover
Canva Pro has made the formerly challenging task of background removal incredibly easy. With just a single click, you can make any product, headshot, or logo stand out and grab attention, free from any distracting backgrounds. I use this on the regular. It is great when working with Staff or Team website pages. I can easily take all the various photos and give them consistent backgrounds like we do over on the Cyber Shift Technologies website.
It works incredibly well and I even wrote a tutorial on how to do it yourself here:
Magic Resize™
The Magic Resize tool eliminates the uncertainty involved in resizing designs and documents, as it comes with pre-set dimensions tailored for each platform. What’s more, it allows you to resize social media posts without distorting or cropping images, ensuring that every post you share maintains a polished and professional appearance.
Canva Pro vs Free: A Brief Comparison
Canva Free is definitely an option for anyone who is starting a new business, but doesn’t have a lot of money to spend. You can use the free plan forever, and it’s packed with features that are ready-to-use right out of the box.
There are some limitations. Here are a three particularly strong reasons for upgrading to Canva Pro.
First, there’s the lack of branding tools on the free version. On the pro plan, you can upload a logo, define your brand color palettes, add your own fonts and share everything with your team members. This comes in handy when you are managing social media for clients or multiple organizations.
Second, on the free plan there are no filters for showing only the free design elements so when you search for resources and images, you will have to sort through a lot of images and resources only available on the pro plan. That can be annoying seeing all the cool stuff you can’t use.
And if you are a web designer, you will miss out on all the output options. On the free plan, you can’t adjust compression settings for your images, and you can’t download SVGs (vector graphics) or PNGs with transparent backgrounds.
These are just a few reasons to consider upgrading to Canva Pro. By investing in a Pro subscription, you can unlock a wide range of advanced features and tools to improve your design workflow and elevate the quality of your creative projects.
It’s Time to Assemble Your Design Squad in Canva
In conclusion, mastering project and team management in Canva is an essential way to unlock your team’s full creative potential. By implementing “Teams” and utilizing Project folders, you’ll streamline your design process, foster effective collaboration, and produce stunning results.
I plan to add more content to this article as I learn more strategies and techniques working with Canva Teams in the future. So be sure to bookmark this article for quick reference.

Geno Quiroz serves on the Marketing & Technology team at IPX1031, a Fidelity National Financial company and a national leader in 1031 tax-deferred exchange services. In his current role, Geno focuses on website architecture, design, development, SEO/AIO, and digital marketing strategy. His work helps strengthen the company’s digital presence, improve user experience, and ensure that IPX1031’s online platforms effectively support client engagement and long-term growth.
Concurrently, Geno continues to lead Monterey Premier, the web design and strategic consulting firm he founded in 2015. Through Monterey Premier, he partners with entrepreneurs, nonprofits, and growing organizations to design high-performance websites, refine digital sales funnels, and implement conversion-focused strategies.
His hands-on experience building and scaling a client-facing agency has provided him with a real-world understanding of growth strategy, brand positioning, and the operational realities of business ownership — experience that now directly informs and strengthens his work in enterprise marketing technology.