How to Set Up a MailChimp Account
Hey there, Trace here from SuperSecretary in the UK *cheery waves*
First of all, I’d like to take the opportunity to thank your Main Man Geno Quiroz for his very kind invitation to write for Monterey Premier’s new “Engaging Worklife” blog – I am absolutely delighted to be a part of this great initiative.
In my first blog, we’re going to be monkeying around with Mailchimp!
And for those of you who haven’t heard of MailChimp, this is one of the most popular e-marketing tools available for small business owners to send newsletters and marketing campaigns, as well as being one of the easiest to get to grips with.
Are you sitting comfortably? Then let’s begin!
Setting Up Your Account
Mosey on over to Mailchimp.com
- Click on the orange button: “Sign up for free” and enter your details.
- Mailchimp will send you an account activation link to the email address you have used to sign up:
- Trace Top Tip: Try and use your website domain name email account, as opposed to a Gmail type account.
- Check relevant Inbox for the email from MailChimp.
- Click on the link provided to confirm and activate your account.
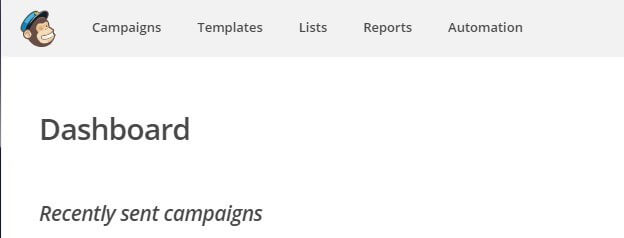
- Go through the steps Mailchimp asks for, and you should now be looking at your fresh as a freshly picked banana Dashboard woohoo! You are, aren’t you? OK, phew!
From left to right across the top: Campaigns, Templates, Lists, Reports, Automation
We will start with LISTS first, but before we dive in, please do read and heed this next bit…
- Trace Top Tip: please do not import emails that you have scraped together, or purchased from a 3rd party. That’s called spamming. Lots of countries, including USA, Canada, Australia, and the UK stipulate that you must have the subscriber’s permission to send emails and communications. Check your country’s status here.
- And, ladies and gents, just because you had a super smashing brilliant chinwag over a coffee and a muffin with Joe Bloggs at a random networking meeting wayyyyy back in 2010…this also means you cannot add their email from the business card they handed over: so don’t do it, OK?! *stern eyes*
By following the above advice, you won’t slip on a pesky banana skin and abuse Mailchimp’s spam rules. If you do disregard the above and receive too many email bounce-backs or complaints, Mailchimp can and will shut down your account. The choice, as they say, is all yours!
GETTING STARTED: LISTS
Here are 3 top tips on e-marketing to your lovely list…
- Build a relationship through timely and useful campaigns and newsletters;
- Position yourself top of mind as their “go-to” source of expertise;
- Nurture trust in order for your subscriber to buy your product or service, yay!
So, let’s get your list set up. Because if you don’t have any subscribers, who are you going to send an email or newsletter to?!
Importing your contact information is really easy.
In the Dashboard, click on the gray “Lists” button

In the Dashboard, click on the gray “Create A List”
Click on the second “Create List” button:

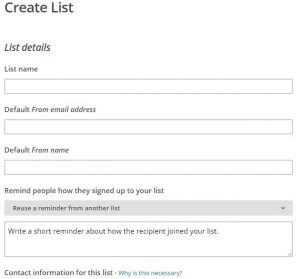
Name your List: bear in mind that potential subscribers can SEE your List Name – so do call it something appropriate!
Complete form boxes with your own information.
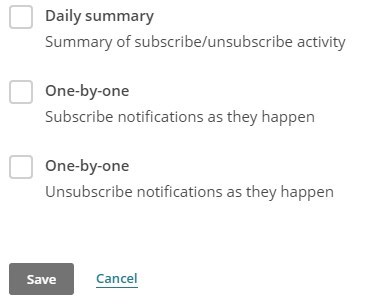
Choose how you want Mailchimp to notify you of Subscribes and Unsubscribes. I usually check the Daily Summary box, but totally your choice.
SAVE!
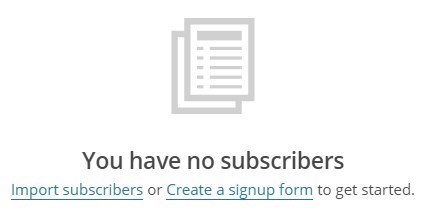
You will now be taken to the “Manage Subscribers” area.
This is where you Import your email contact information to your list.
Select the “Import Subscribers” hyperlink.
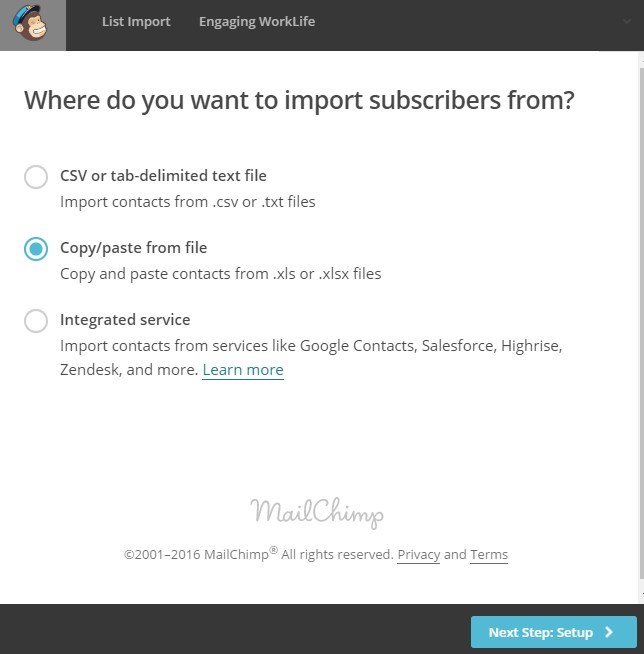
You will see 3 options to add in your information.
I tend to go for the “Copy/Paste” from Excel, so we will use that example.
Press NEXT.
Your Excel sheet “Cells” must be ordered:
- Email Address
- First Name
- Last Name
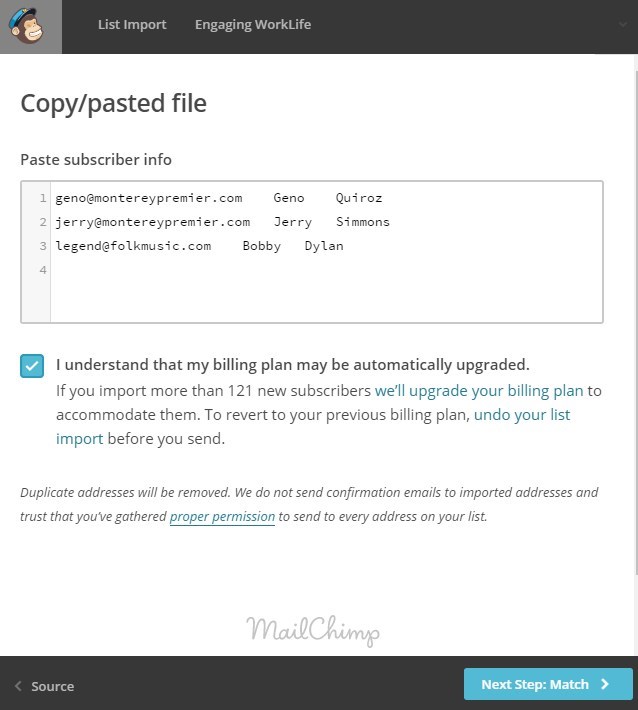
Select your contact information, without the “Headings”.

Paste into the Subscriber Information area that Mailchimp provides.
Tick the “Billing Plan” box.
Press NEXT.
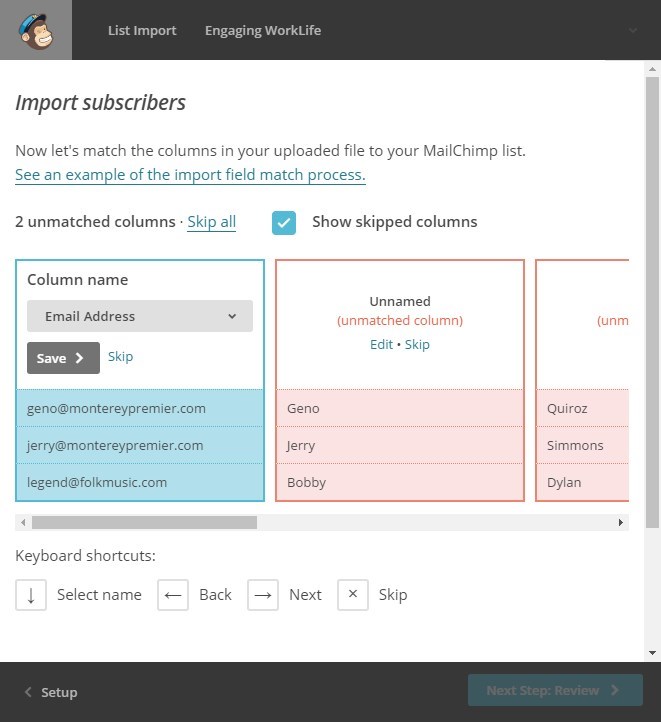
Now, it’s time to “Match Columns” against the information you have just imported:
Mailchimp will recognize the first column as an email address – simply press “SAVE”.
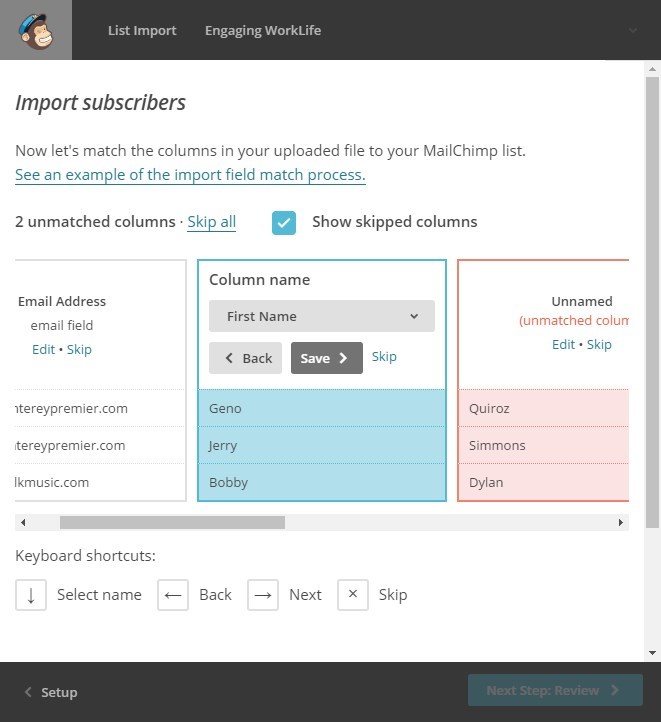
Second column – select Edit – select Make A Selection – select First Name
SAVE
Third column – select Edit – select Make A Selection – select Last Name
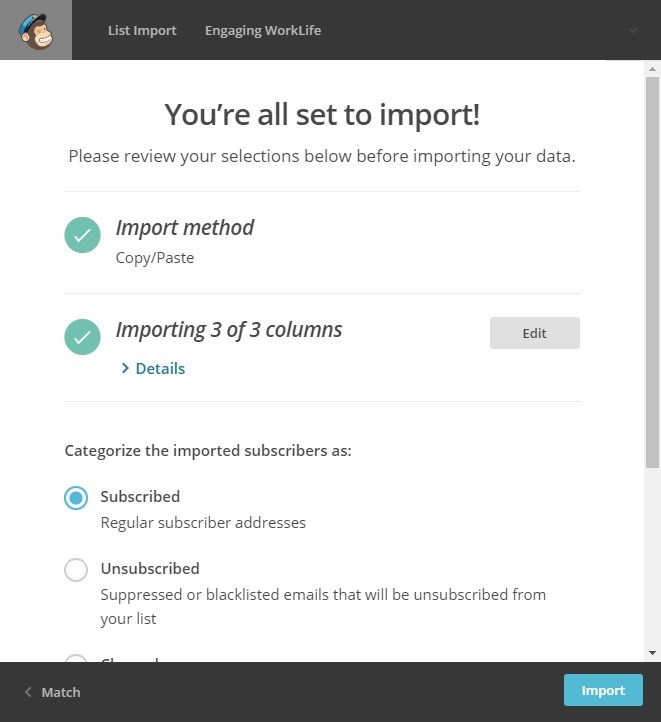
SAVE, NEXT and IMPORT!
List Notes:
- You can have up to 2,000 subscribers in your FREE account before you have to upgrade to the Paid version.
- If you wish to send an automated (i.e. pre-scheduled content) e-marketing campaign, you will need to upgrade to a paid account.
- If you want to remove the Mailchimp logo in your e-marketing campaigns/newsletters, that’s a paid feature too!
Select the Mailchimp Monkey icon in your top left-hand corner to take you back to your Dashboard.
And that’s your Mailchimp account activated and ready to go!
Your next steps are:
- To create newsletter and email broadcast templates that are branded to your business. I like to have two templates: one fully branded “Fancy Nancy” for my newsletters, and a branded but super clean version for sending out a quick update or to let subscribers know about a special offer, or new product/service etc. You get the picture…
- Add a “Subscribe” sign-up box onto your WordPress website using:
- Mailchimp plugin;
- If you use the DIVI theme – use their Email Opt-in module;
- Mailchimp generated sign-up form code placed into a widget;
- Elegant Themes Bloom & Bloom Redirect URL plugins. Please feel free to check out my website to see the Bloom plugin in action.
- I highly recommend that you create an email list building “freebie”. PDF download, free webinar sign-up, an online competition, infographic download, a really useful online tool or resource. There are STACKS of list building ideas out there! Think of something totally geared to your audience that you can easily and quickly create to give away, in exchange for their email.
In my next blog, I will show you HOW to do Steps 2 and 3, so that you have a great “freebie” email list builder on your website.
In the meantime, get your account activated, your list imported, and create your templates so you’re ready to rock and roll!
Warmest regards, Trace
Hey, I’m Trace from SuperSecretary based in the North East of England. Loves to create a strong online presence with contemporary, affordable WordPress websites, design, and Mailchimp e-marketing expertise for UK women in business, whether start-ups or ready to grow! Font lover, cat wrangler, dog bimbler, espresso addict, and partial to a biscuit. Usually seen attached to a keyboard, iPad, dog lead or muddy trowel. Lover of books, all things sparkly, gardening, bbc4 scandi-noir, music, and red lipstick. Not necessarily in that order!

